I have trimmed dairy cattle since 1994, close to half a million hooves, and I can tell you the right tools decide whether a trim goes smooth or turns into a long, frustrating hour with a cow that would rather be anywhere else. This is the tool kit I actually carry, sorted by the order you use it in a real session, with honest notes on what you need on day one and what can wait.
A complete cow hoof trimming tool kit covers five stages of a trim. The setup, which is your chute and gating. Cutting tools, meaning a sharp hoof knife and, for many trimmers, a grinder. Inspection, which is a hoof tester. Treatment and aftercare, which is where Intra Hoof-fit Gel, a treatment plier, hoof blocks, tape, Repiderma, and a wrap remover come in. And basic cleaning supplies. You do not need every item to start. You need the ones that match how many cows you trim.
Here is each tool, why it earns a place in the kit, and where you can hold off spending when you are just getting going.
1. The Setup
Before you touch a hoof, the way you hold the cow has to be right. Everything else depends on it.
The Hoof Trimming Chute
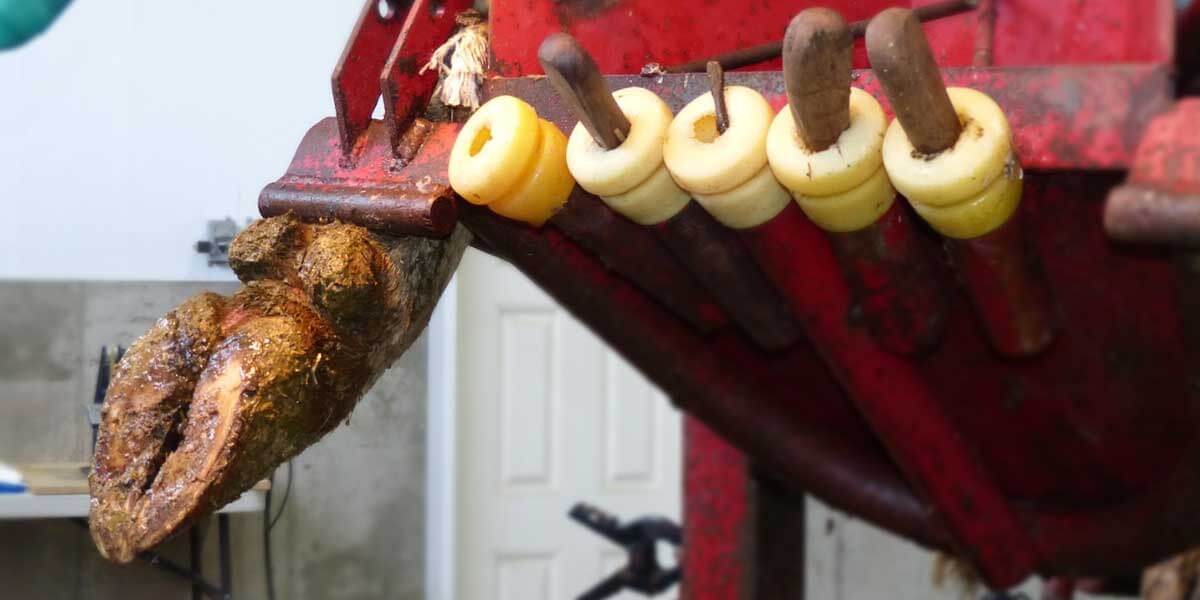
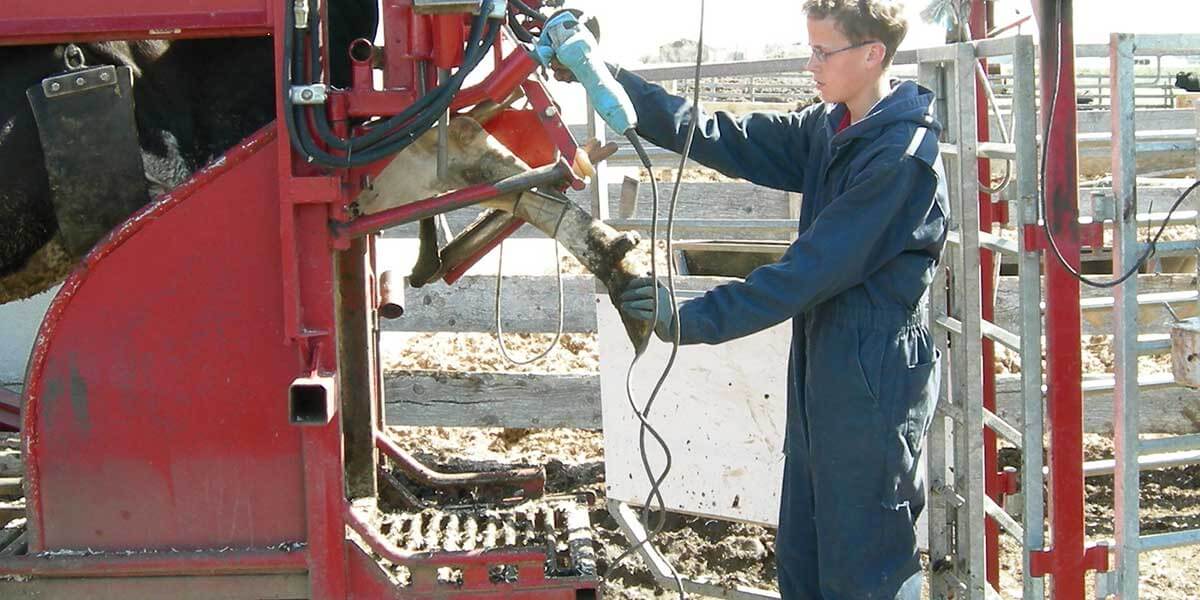
A good chute is the single most important thing in the whole kit, because it decides whether trimming is safe. It holds the cow steady so you can work without getting kicked, and it brings the foot up to a height where you are not hunched over wrecking your back all day. Trim a few hundred cows bent double and you will feel it. A chute takes that strain off you, and it lets you read and work a foot properly, which you simply cannot do when a cow is fighting you.
On top of the safety, the numbers make it easy. Research puts the cost of a single lameness case at $336.91 once you count lost milk, treatment, and reduced fertility, and it climbs another $13.26 for every week the cow stays lame. There is more on the cost of lameness here. It does not take many cows caught early to pay off a chute that will last you twenty-five years.
The size of chute you need comes down to how many cows you handle:
- Under 80 cows: a manual chute is plenty.
- 80 to 200 cows: a basic hydraulic starts to earn its keep.
- 200 cows or more, or if you trim for a living: go to a full hydraulic with a working platform.
I have met farmers with 65 cows who bought a full hydraulic unit because hoof care is a given as long as they milk, and they wanted to enjoy doing it. That is a fair reason too. If you want to compare brands and features before you commit, I put that together here: Hoof Trimming Chutes Compared.
The Gating System
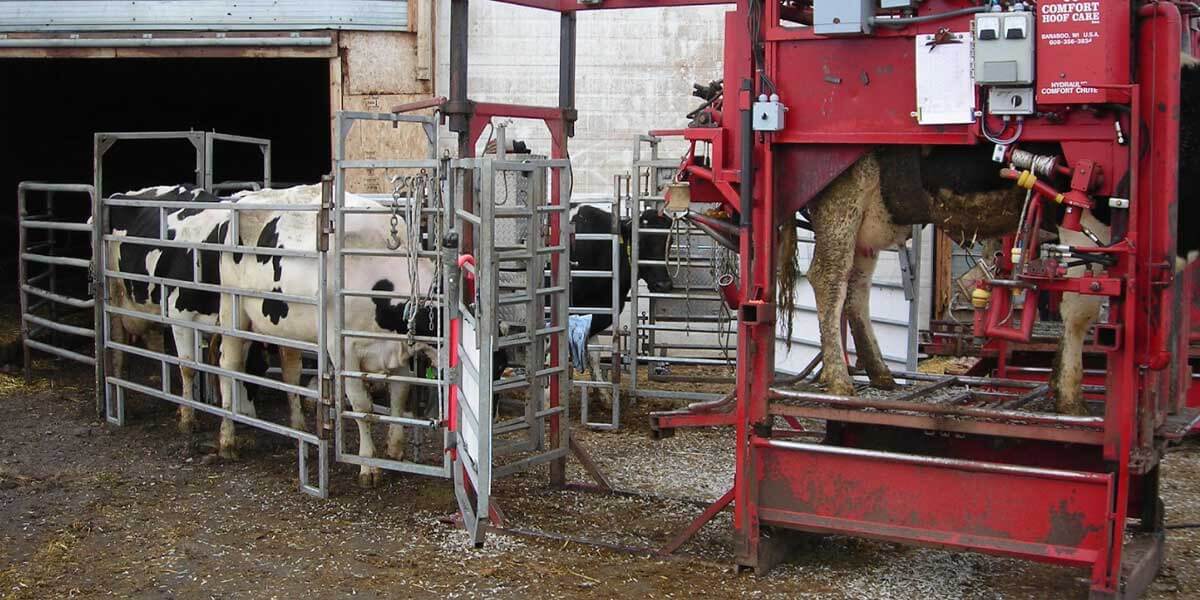
A smooth flow of cows to the chute is time well spent. A short alley and a couple of well-placed gates let you sort an animal and bring her to the chute without a fight, which keeps her stress low and takes the frustration out of the job. It also saves you a pile of labor. When the gating is right, one person can move a cow and get her in on their own. When it is wrong, you end up pulling three or four people off other work just to wrestle one cow into place, and that tied-up labor costs you every single time. Good gates are a no-brainer and money well spent. If you are putting up a new barn it is easy to build a treatment area in, and if you are retrofitting an older one it is worth raising with your building designer before the shovel goes in the ground.
2. Cutting Tools
These next tools all do the same core job. They take off the excess horn and shape what is left. Some of that horn is hard work to move. The sole horn is softer than the wall horn, but you still need the right tool to shape it cleanly. This is where sharp, well-made tools earn their place. A sharp edge takes far less force, which is easier on your hands, your wrists, and your back over a long day, and it lets you do the fine, precise work a dull tool never can.
The Hoof Knife
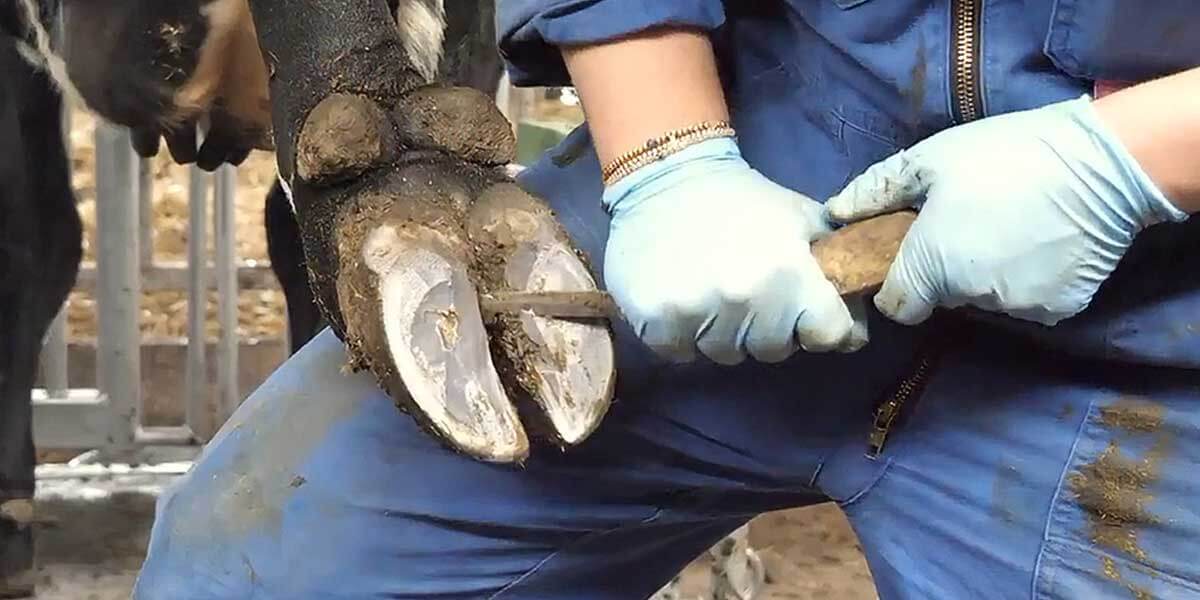
The plain hoof knife is still the tool at the center of every trim. When the blade is dull you push too hard, and that is when the knife dives too deep or takes off too much horn. Most knives come pre-shaped so they are easier to sharpen, but that does not mean they arrive sharp. I sharpen mine using the method Mitch St. Pierre of The Hoof Guy shows in his video, and the stainless steel on a professional knife holds that edge far longer than cheaper steel.
Our own Diamond hoof knife has been made to the same quality since 2017, and a lot of full-time trimmers across North America reach for it every day. If you have gone looking for a Diamond knife, this is the one built to earn its keep in a professional's hand.
One thing many people do not realize is that hoof knives are handed. There is a left and a right, and buying the wrong one makes the whole job awkward, so check before you order. You can see the knife I use here: Diamond Hoof Trimming Knife.
Hoof Nippers
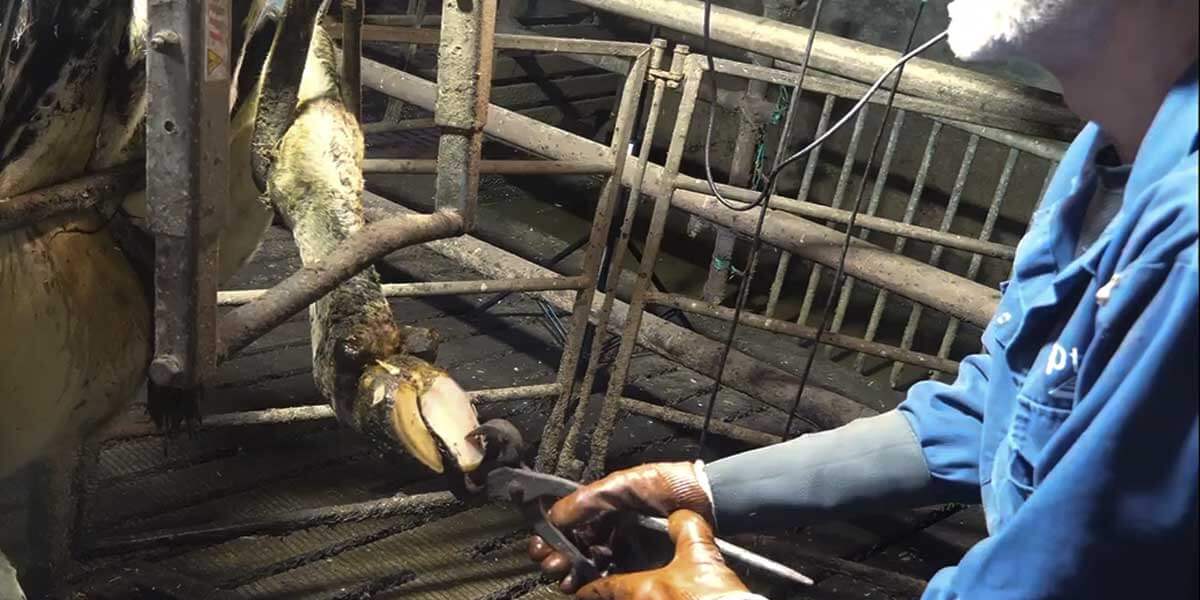
Nippers are worth understanding even though I do not sell them, because farmers ask me all the time how they differ from a knife. A knife pares and shapes horn. Nippers cut off bulk length, mainly excess toe. You hold them roughly perpendicular to the sole and take the toe back to about three inches from the coronary band. If a claw is already under about three and a quarter inches, leave it, because the sole underneath is likely too thin to give up any more. Where a knife finishes a hoof, nippers get you to the rough length quickly on an overgrown foot.
The Angle Grinder and Disc
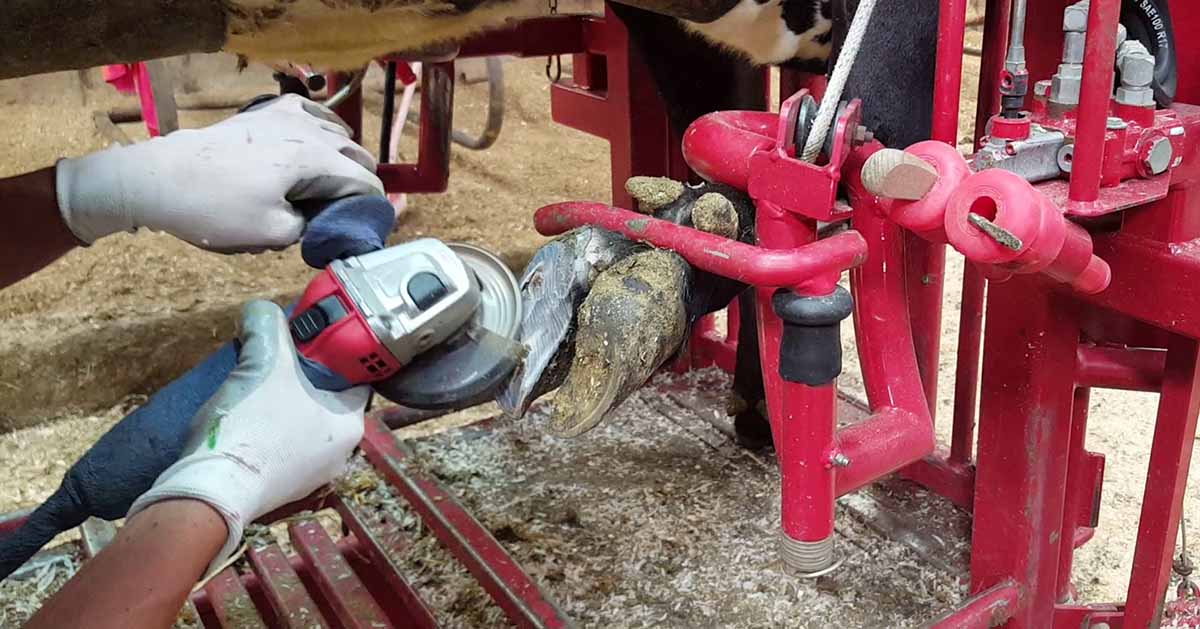
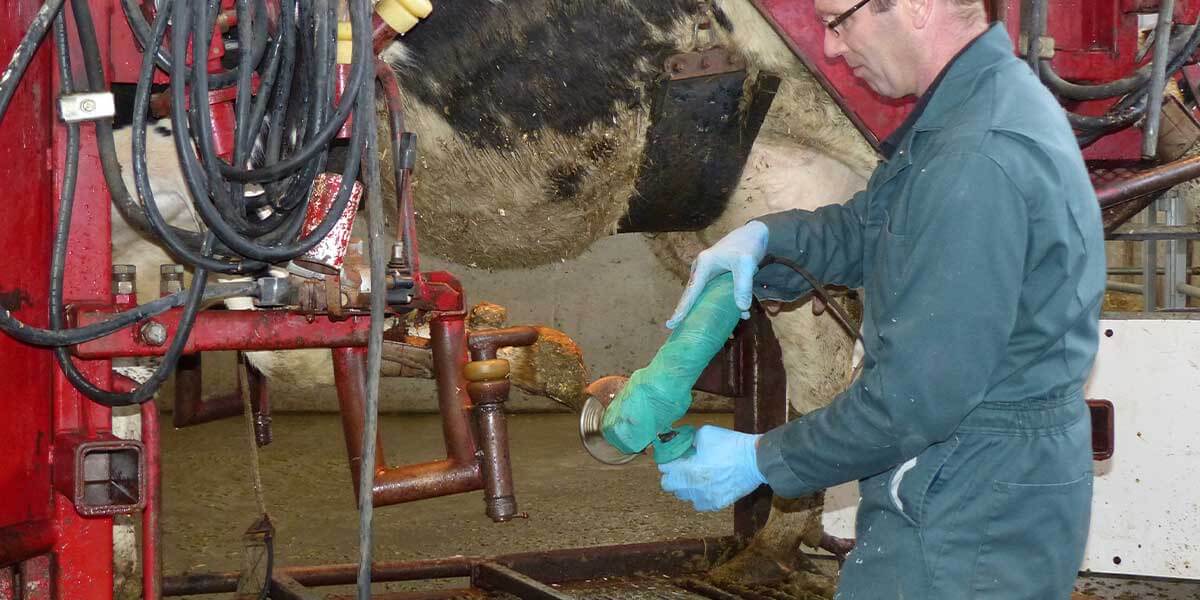
An angle grinder removes horn faster than a knife, and there is a good reason to reach for one. The outer quarter inch of the hoof wall is the hardest horn on the foot, and little stones get pressed into the sole and wreck a sharp edge the moment you hit one. A grinder does not care about a pebble. The spec most trimmers use is a four and a half inch angle grinder, and it needs a steady, careful hand so you do not take off too much.
A grinder does not replace the knife, it works with it. You use the grinder to move horn and the knife to finish and read the foot. For the disc itself, the Trim-Tec Shaver is a good place to start, and the Trim-Tec Titan gives a more aggressive bite once you have the feel for it. You can see the range here: Trim-Tec hoof trimming wheels. I do not sell grinders or discs, so this is simply what I would point you toward.
3. Inspection
The Hoof Tester
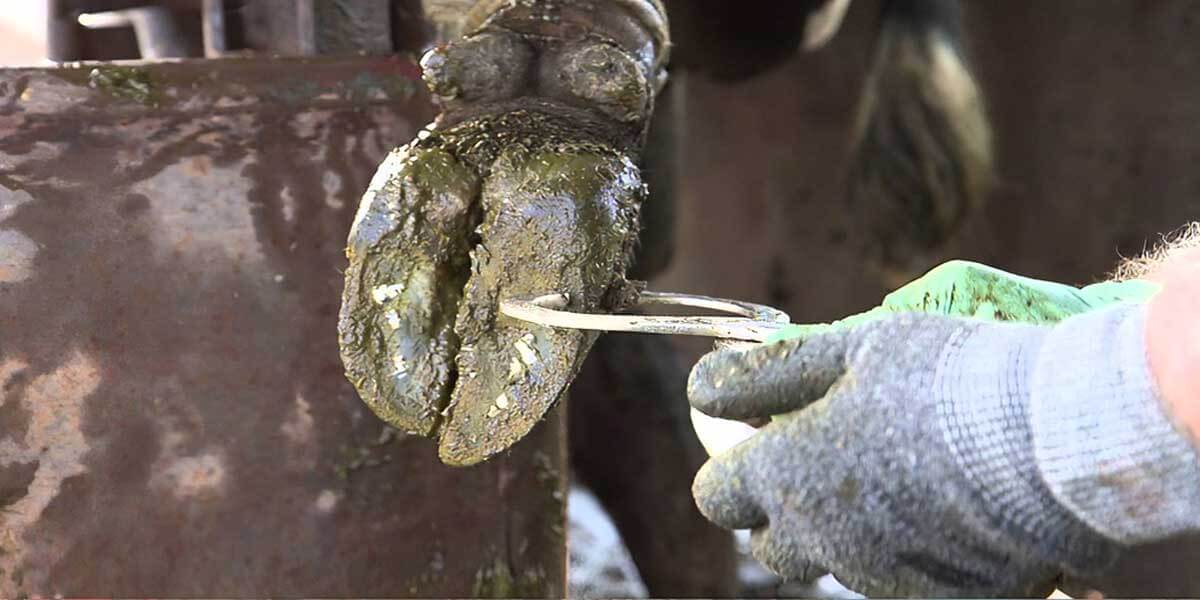
Reach for a hoof tester when you cannot find the cause of the lameness from the outside of the foot. This is the tool that lets you check the inside and find exactly where a cow is hurting, whether it is an ulcer or a white line problem. The jaws press on the sole and wall, and the ends grip the horn without sliding off, so with a little practice you can pin down the sore spot without putting the cow through much discomfort.
There is a second use most people miss. Before you glue a block, test the healthy claw. It often looks solid from the outside, but it has been carrying extra weight while the cow was lame, and you want to know it can take the load before you rely on it. A proper tensioned tester tells you far more than a simple probe. Mine is here: Hoof Tester Pro. If you want a hand matching what you feel to a diagnosis, the free Hoof Disease Reference Chart is a good sheet to keep near the chute.
4. Treatment and Aftercare
This is where a lot of tool lists fall short. Finding the problem is only half the job. You also have to treat it and protect it while it heals.
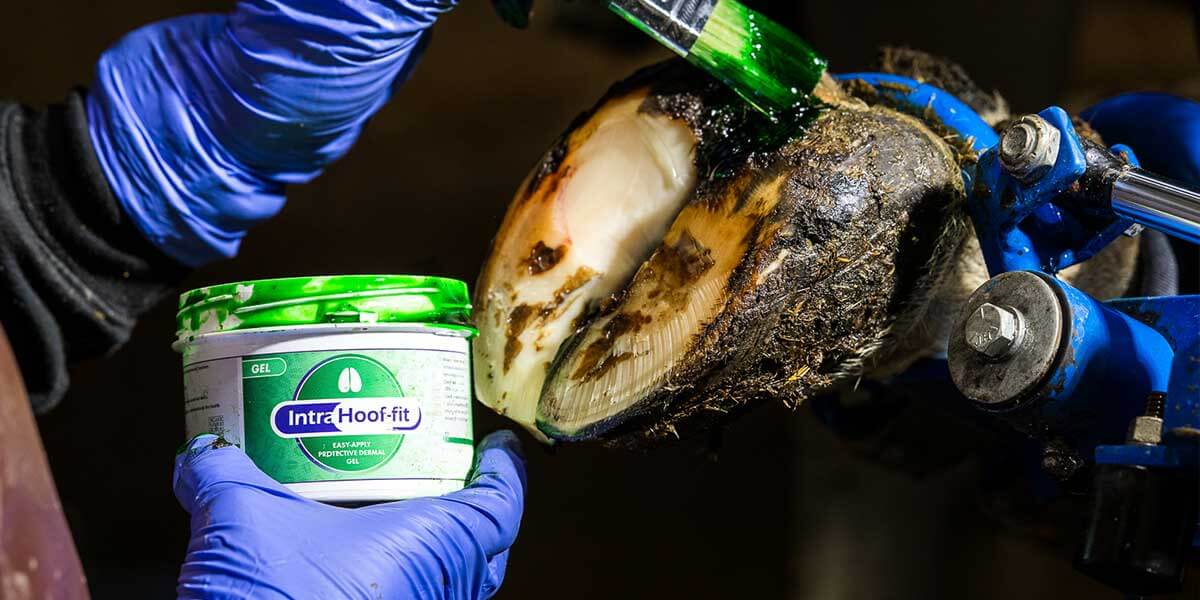
Intra Hoof-fit Gel
Intra Hoof-fit Gel is our registered, non-antibiotic treatment for active digital dermatitis, the M2 lesions you find in the chute. It is Canada's DIN-approved product for that job. For a straightforward case you apply it directly to the lesion. For a more severe one you put it on a cotton pad and wrap the foot for a few days so it stays in contact with the tissue. See it here: Intra Hoof-fit Gel.
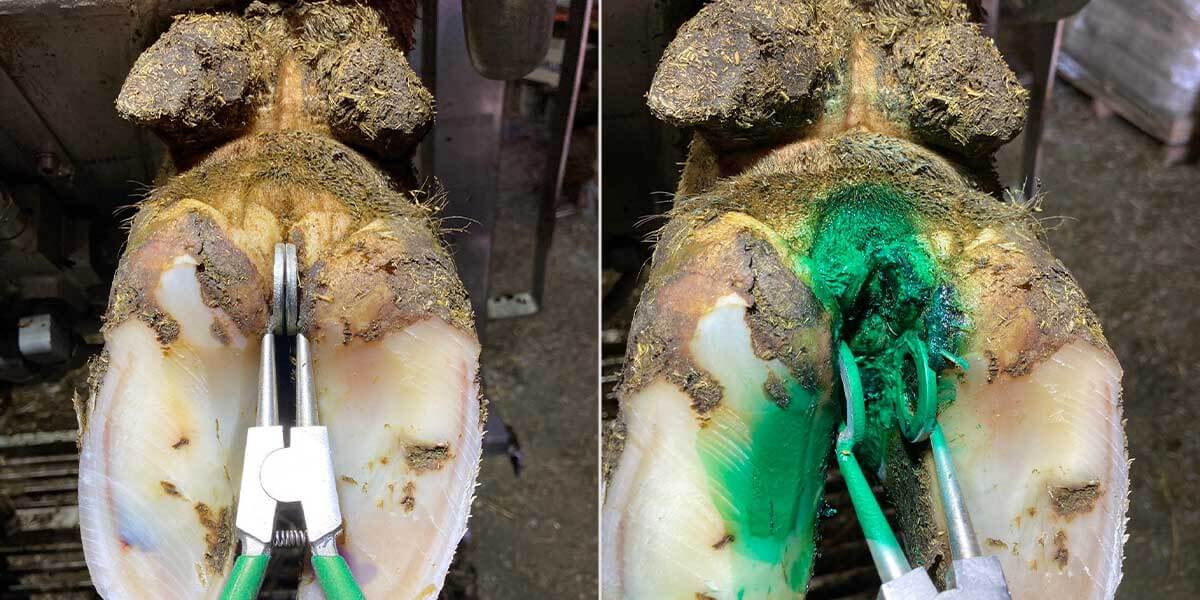
The Hoof Treatment Plier
To treat a lesion sitting deep in the cleft between the claws, you first have to open that space, and that is what the treatment plier does. It holds the cleft open so you can get your product right where it needs to go, the Hoof-fit Gel on an active lesion or Repiderma to support the skin. It is a small tool that makes a real difference on the harder-to-reach cases, and it works hand in hand with both: Hoof Treatment Plier.
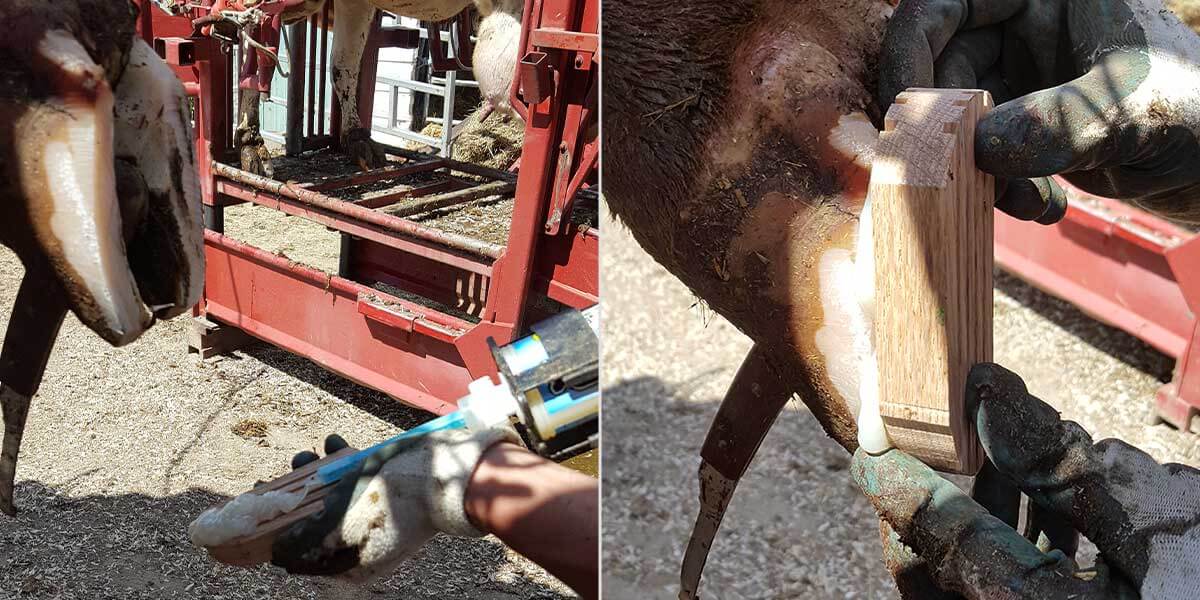
Hoof Blocks and Adhesive
A block takes the weight off a diseased claw and shifts it onto the healthy one, which is exactly what a cow with a sole ulcer or white line disease needs so she can stand comfortably while the sore claw heals. The Demotec Easy Bloc is a good option for this, because you mix the adhesive right in the shoe and press it onto the prepared claw, which leaves more room for error than a traditional wooden block. We list it on the website and you can pick it up through one of our dealers. There is a full walk-through of the technique here: How to Apply Hoof Blocks.
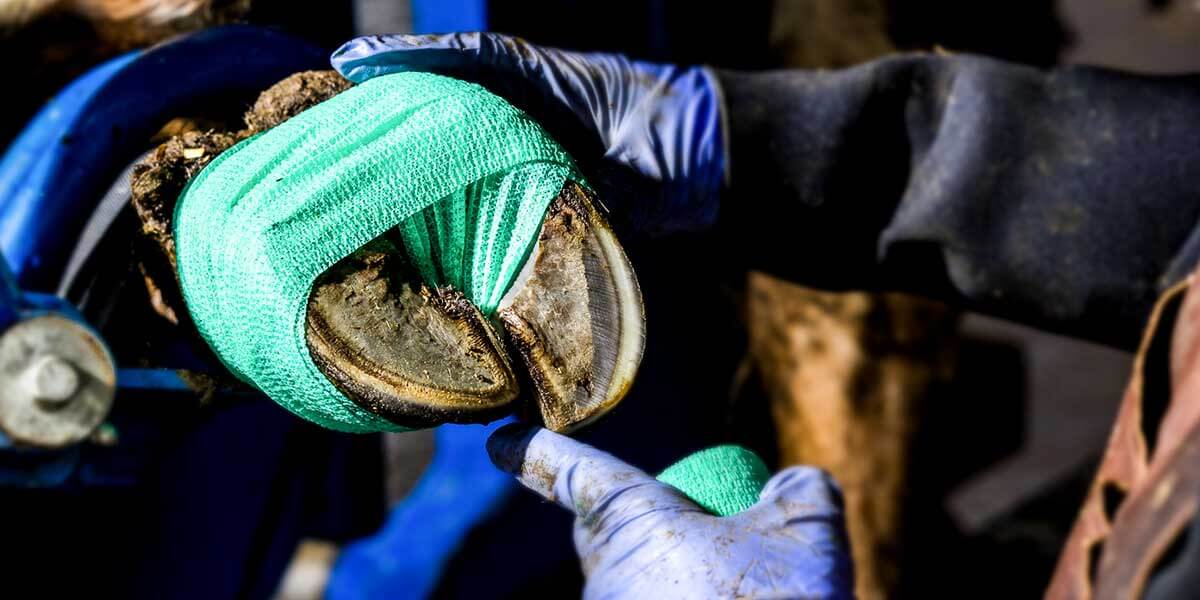
Intra Tape
Tape is the middle step in the wrap protocol. You treat the lesion with Intra Hoof-fit Gel, wrap the foot to hold everything in place, and then remove it in three to four days. It does its job as long as it comes off on time. Our standard wrap is the Intra Hoof-fit Tape. There is also the Intra Eco Tape, which stretches, tears, and holds the same way but is biodegradable and packed without plastic, so you are not leaving synthetic wraps behind in the pit or the field. A roll of the Eco Tape also covers a few more hooves.
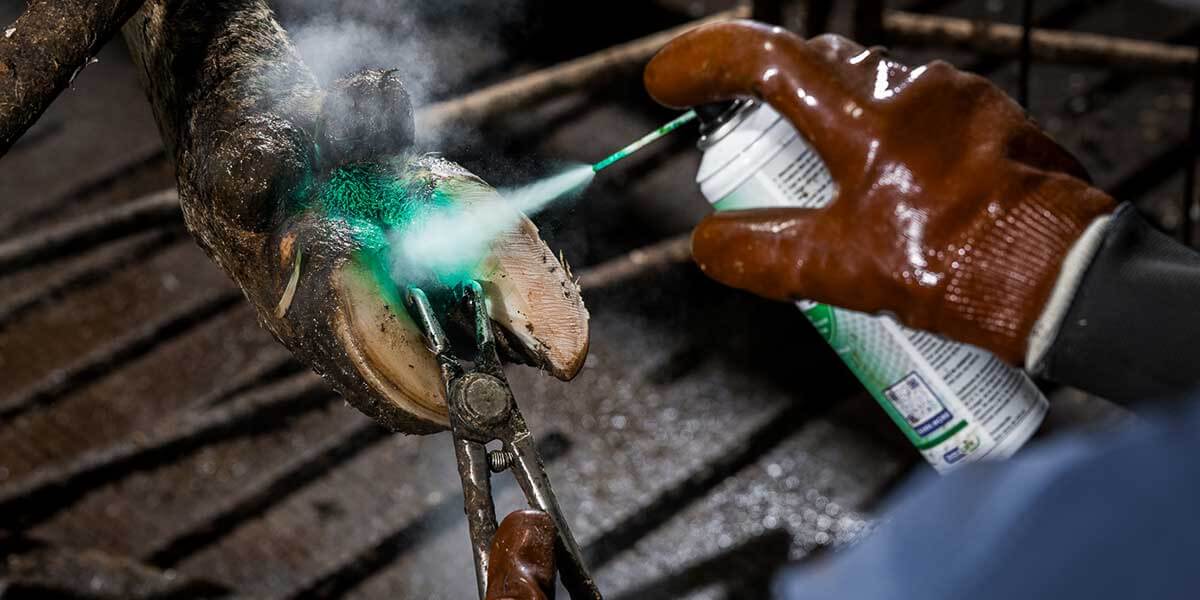
Repiderma
Repiderma is a skin-care spray that supports healthy hoof and skin and helps protect against minor skin damage between trimmings. It is handy to have on the shelf for routine skin support: Repiderma.
The WrapAway
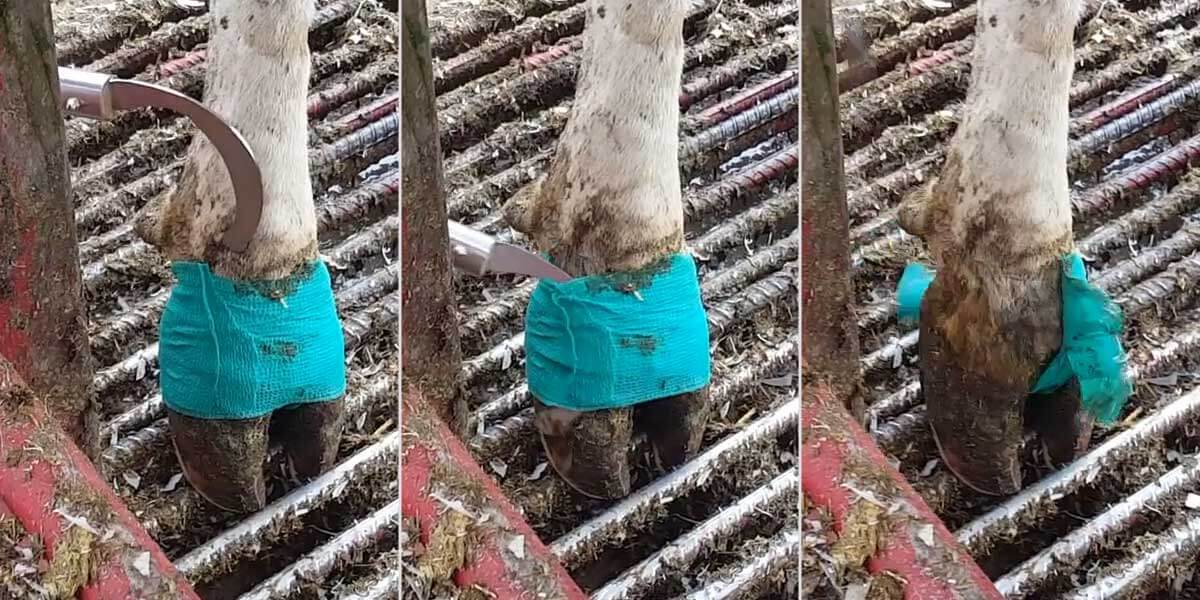
A wrap that is left on too long stops helping and starts doing damage. I had a call from a trimmer who had finished a badly infected herd, close to seventy percent showing digital dermatitis, and when she went back to recheck, none of the wraps had been removed and some were causing harm. That is the whole problem the WrapAway solves. It lets you cut a wrap off quickly and safely, in the barn or the parlour, without bending or crawling under a cow, so the three to four day removal window actually gets met: WrapAway.
5. Cleaning Supplies
Air Hose and Towels
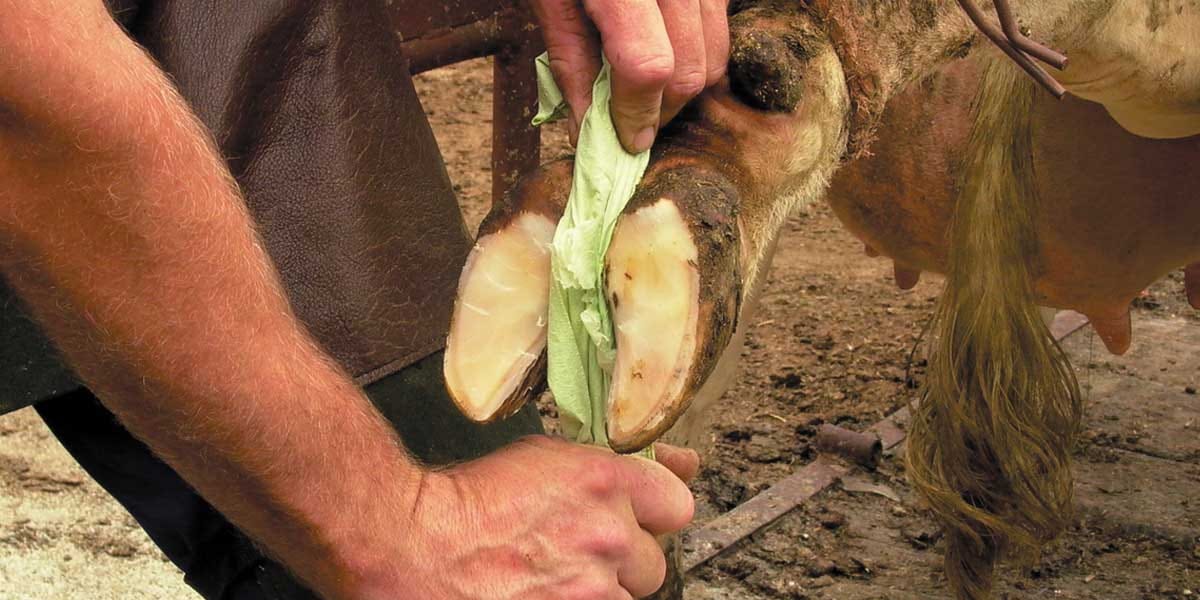
A clean hoof is far easier to read, so a coiled air hose in the treatment area is one of the handiest things you can add. A paper towel or a hand towel works for wiping a foot down. Keep the water out of the chute, though. It makes a mess, it is usually unnecessary, and it fills the pores in the skin, which limits how well the Intra Hoof-fit Gel absorbs when you are treating digital dermatitis.
Your Hoof Trimming Tools Shopping List
Use this as your hoof cleaning tools list when you head to the supply store. The farmer column is the minimum kit for looking after your own herd. The professional column is closer to what I carry.
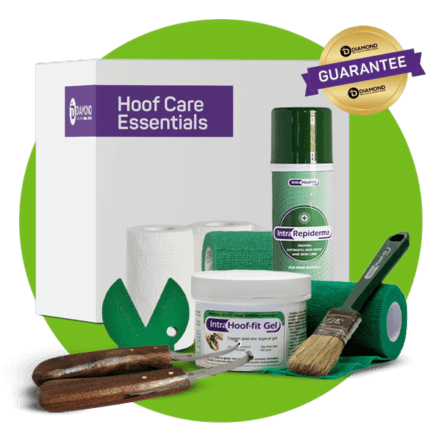
If you would rather not piece the farmer kit together item by item, our Hoof Care Essentials Kit puts the core products in one starter package. It is an easy way to get going with your own herd without wondering whether you have missed something.
Hoof Care Essentials Kit
This handy hoof care and skin care starter kit is designed for livestock owners who need to ensure their animals' hooves are properly trimmed and cared for.
Get Started NowFrequently Asked Questions
What tools do you need to trim cattle hooves?
At a minimum you need a way to hold the cow safely, which is a chute, and a sharp hoof knife. From there you add a hoof tester to find hidden problems, Intra Hoof-fit Gel and tape to treat and protect a lesion, and a way to remove wraps. A grinder and nippers speed up the cutting work but are not essential to get started. If you would rather start with the core products in one box, the Hoof Care Essentials Kit covers them.
What is the difference between hoof nippers and a hoof knife?
Nippers cut off bulk length, mostly excess toe, and get an overgrown claw back to rough size fast. A knife does the fine work of paring the sole and shaping the claw. Most farmers can trim well with a knife alone. Nippers just make the first rough cut quicker.
Do you need a grinder to trim cow hooves, or is a knife enough?
A sharp knife is enough to trim a cow well, and plenty of good trimmers work mostly by knife. A grinder helps when horn is hard or when stones in the sole keep dulling your edge. It works alongside the knife, it does not replace it.
What is a hoof tester used for in cattle?
A hoof tester finds the source of lameness when you cannot see it from the outside. You press the jaws against the sole and wall to locate the sore spot, so you can tell an ulcer from a white line problem, and you can also check that a healthy claw is sound before you glue a block to it.
Should I use a manual or hydraulic chute for 100 cows?
For a herd around that size a basic hydraulic is usually the sweet spot. Under 80 cows a manual chute is fine, and once you are past 200 cows or trimming for a living, a full hydraulic with a platform is worth it. Make hoof care your hobby or your passion, and you will not regret having a hydraulic chute to make the job easy for many years to come.
What is the minimum equipment to trim my own herd?
A chute to hold the cow, a sharp hoof knife, a hoof tester, Intra Hoof-fit Gel with tape for treatment, and a wrap remover. That covers holding, cutting, diagnosing, treating, and protecting the foot, which is everything a routine trim needs.
Keep It Stocked and Catch Trouble Early
A fully stocked cabinet near your chute is what lets you deal with a lame cow the moment you spot her instead of putting it off, and earlier detection gives you more success every time. Keep the kit ready, keep an eye on your herd, and you will catch small problems before they turn into chronic ones. If you are just building your kit, our Hoof Care Essentials Kit is the simplest way to start, a starter package with the core products in one box. And to help you tell one lesion from another, keep the free Hoof Disease Reference Chart near the chute.